Exposing a Web Management Interface Through Simple Firewall
Overview
In this tutorial, you'll create a simple web management interface and configure your firewall to expose that service only through the ethernet interface while keeping the default firewall policy intact.
What you'll learn:
- Create a package providing a minimal web page
- Host it using a lightweight web server in your Yocto image
- Configure the firewall using Welma
sfwto allow HTTP traffic on a specific network interface - Validate connectivity from a client machine
What you'll need:
- A workstation with a Linux operating system
- A Raspberry Pi 4B device
- The device is reachable from you workstation through serial port and network
- WiFi Hotspot
Step 1: initial setup
Create your working directories on your workstation:
ROOT=...               # your root working directory
mkdir $ROOT/build      # your Yocto build directory
mkdir $ROOT/sources    # your Yocto layers
Download Welma into $ROOT/sources:
cd $ROOT/sources

MACHINE=raspberrypi4-64-welma
WELMA_REF=scarthgap-next
WELMA_GIT_NAMESPACE=witekio/rnd/theembeddedkit/welma

git clone git@gitlab.com:$WELMA_GIT_NAMESPACE/welma-manifest.git
welma-manifest/setup-download welma-manifest/$WELMA_REF/manifest-$MACHINE.txt
Set up your Yocto build directory in $ROOT/build.
cd $ROOT
source sources/meta-welma/setup/setup-build-env \
       sources/meta-welma-raspberrypi/conf/templates/$MACHINE
If you did not fuse the PBKH on your device, do not try to do it now, but be
sure to add WELMA_SECURE_BOOT="0" in your conf/local.conf.
Build the development image:
Install the image on you device:-
Insert the SD card in your workstation.
-
Copy the Welma image to the SD card (be careful about the destination
/dev/mmcblk0, your milage may vary):
gunzip --stdout \
    tmp/deploy/images/$MACHINE/welma-image-minimal-dev-$MACHINE.wic.gz |
    sudo dd of="/dev/mmcblk0" bs=10M
sync
Remove the SD card from your workstation, and insert it into your device. Do the cabling so as to get console access and network access to your device. Then start your device.
You should now see the device booting on the console, something like this:
  0.51 RPi: BOOTSYS release VERSION:69471177 DATE: 2025/05/08 TIME: 16:21:35
...
  2.53 RPi: BOOTLOADER release VERSION:69471177 DATE: 2025/05/08 TIME: 16:21:35
...
U-Boot 2024.01 (Jan 08 2024 - 15:37:48 +0000)
...
Starting kernel ...
...
[    0.000000] Linux version 6.6.63-v8 (oe-user@oe-host) (aarch64-poky-linux-gcc (GCC) 13.4.0, GNU ld (GNU Binutils) 2.42.0.20240723) #1 SMP PREEMPT Fri Dec  6 10:10:05 UTC 2024
...
Welma by Witekio 1.6.1 raspberrypi4-64-welma ttyS0

raspberrypi4-64-welma login:
Step 2: create a Yocto layer
Create a dedicated directory $ROOT/sources/meta-management, in which you
create the following:
# Add layer to BBPATH
# We have a conf and classes directory, add to BBPATH
BBPATH .= ":${LAYERDIR}"

# We have recipes-* directories, add to BBFILES
BBFILES += "${LAYERDIR}/recipes-*/*/*.bb \
            ${LAYERDIR}/recipes-*/*/*.bbappend"

BBFILE_COLLECTIONS += "management-layer"
BBFILE_PATTERN_management-layer = "^${LAYERDIR}/"
BBFILE_PRIORITY_management-layer = "1000"

LAYERSERIES_COMPAT_management-layer = "scarthgap"

IMAGE_INSTALL:append = " management-if wlan-config"
This configuration adds the management-if application
created in step 5 and a minimal
WiFi configuration created in step 4
to the compiled image.
Step 3: enable webserver in BusyBox
We will use BusyBox httpd as a lightweight embedded web server. To enable httpd configuration, create the following files:
The httpd.cfg fragment should contain the following httpd configuration:
CONFIG_HTTPD=y
CONFIG_FEATURE_HTTPD_PORT_DEFAULT=80
This configuration is appended to BusyBox recipe through the busybox_%.bbappend file:
FILESEXTRAPATHS:prepend := "${THISDIR}/files:"

SRC_URI += "file://httpd.cfg"
Step 4: configure WLAN network interface
To verify that the management interface is accessible only through the
eth0 Ethernet interface, you need to configure the Wi-Fi interface and
ensure that the web server does not respond when accessed via its Wi-Fi
IP address. To proceed, create the following files:
recipes-network
└── wlan-config
    ├── files
    │   ├── 01-wlan0.network
    │   └── wpa_supplicant-wlan0.conf
    └── wlan-config.bb
SUMMARY = "Minimal wlan interface configuration"
LICENSE = "CLOSED"

SRC_URI += " \
    file://01-wlan0.network \
    file://wpa_supplicant-wlan0.conf \
    "

RDEPENDS:${PN} += "wpa-supplicant"

do_install() {
    install -d ${D}${systemd_unitdir}/network
    install -d ${D}${sysconfdir}/wpa_supplicant

    install -m 0644 ${WORKDIR}/01-wlan0.network ${D}${systemd_unitdir}/network
    install -m 0600 ${WORKDIR}/wpa_supplicant-wlan0.conf ${D}${sysconfdir}/wpa_supplicant
}

FILES:${PN} += "\
    ${systemd_unitdir}/network/01-wlan0.network \
    ${sysconfdir}/wpa_supplicant/wpa_supplicant-wlan0.conf \
"
This recipe will install a minimal configuration for the Wi-Fi interface. To do
this, the Wi-Fi network credentials will be provided by the wpa_supplicant-wlan0.conf
file, its content could be generated using the following command:
Here is an example of wpa_supplicant-wlan0.conf with an wifi-ssid as SSID and
password as a password:
network={
        ssid="wifi-ssid"
        #psk="password"
        psk=af83b4c658cbb0c9ee5f9f660fd71c68e613fd00630992f9efb416a3c12e38f7
}
In order for the wlan0 interface to be configured correctly by
systemd-networkd, the configuration file 01-wlan0.network is
installed with the following content:
[Match]
Type=wlan
Name=*0
Name=!dummy*

[Network]
DHCP=yes
Step 5: add web management application
We're now creating a minimal application, called management-if, that
provides a web management interface with web server configuration.
In meta-management, create the following files and directories:
recipes-management
└── management-if
    ├── management-if.bb
    └── files
        └── httpd.conf
        └── management-if.html
        └── management-if.service
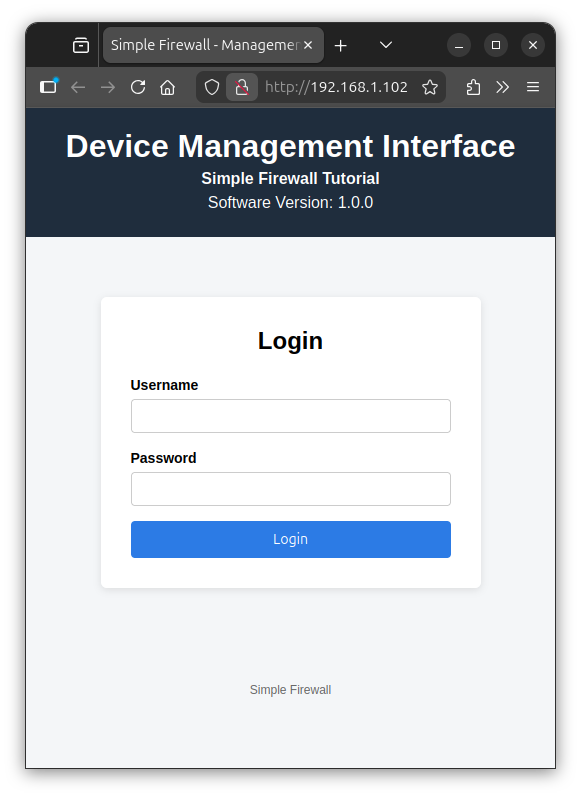
We start by writing a simple HTML page that will act as the management interface:
<!DOCTYPE html>
<html lang="en">
<head>
  <meta charset="utf-8" />
  <meta name="viewport" content="width=device-width, initial-scale=1" />
  <title>Simple Firewall - Management Interface</title>

  <style>
    body {
      font-family: Arial, Helvetica, sans-serif;
      background-color: #f4f6f8;
      margin: 0;
      padding: 0;
    }

    header {
      background-color: #1f2d3d;
      color: #ffffff;
      padding: 20px;
      text-align: center;
    }

    header h1 {
      margin: 0;
    }

    header p {
      margin: 5px 0;
    }

    main {
      display: flex;
      justify-content: center;
      margin-top: 60px;
    }

    .login-box {
      background-color: #ffffff;
      padding: 30px;
      width: 320px;
      border-radius: 6px;
      box-shadow: 0 2px 8px rgba(0, 0, 0, 0.1);
    }

    .login-box h2 {
      margin-top: 0;
      text-align: center;
    }

    label {
      font-size: 14px;
      font-weight: bold;
    }

    input[type="text"],
    input[type="password"] {
      width: 100%;
      padding: 8px;
      margin-top: 5px;
      margin-bottom: 15px;
      border: 1px solid #ccc;
      border-radius: 4px;
      box-sizing: border-box;
    }

    button {
      width: 100%;
      padding: 10px;
      background-color: #2c7be5;
      color: #ffffff;
      border: none;
      border-radius: 4px;
      cursor: pointer;
      font-size: 14px;
    }

    button:hover {
      background-color: #1a68d1;
    }

    footer {
      text-align: center;
      margin-top: 80px;
      padding: 15px;
      font-size: 12px;
      color: #666;
    }
  </style>
</head>

<body>

  <header>
    <h1>Device Management Interface</h1>
    <p><strong>Simple Firewall Tutorial</strong></p>
    <p>Software Version: 1.1.0</p>
  </header>

  <main>
    <div class="login-box">
      <h2>Login</h2>

      <form method="post" action="/login">
        <label for="username">Username</label>
        <input type="text" id="username" name="username" required />

        <label for="password">Password</label>
        <input type="password" id="password" name="password" required />

        <button type="submit">Login</button>
      </form>
    </div>
  </main>

  <footer>
    Simple Firewall
  </footer>

</body>
</html>
This minimal page is sufficient to validate:
- Web server operation
- Network exposure
- Firewall filtering
To use management-if.html as the index, httpd should be started with
the provided httpd.conf configuration file:
To start the web server automatically at boot, we create a
dedicated systemd service, called management-if.service
[Unit]
Description=Web Management Interface
After=network.target
Requires=network.target

[Service]
ExecStart=/usr/bin/busybox httpd -f -h /var/www -c /etc/management-if/httpd.conf
Restart=always

[Install]
WantedBy=multi-user.target
The management-if.bb will install the web management
interface under /var/www:
SUMMARY = "Minimal Web Management interface"
LICENSE = "CLOSED"

SRC_URI += " \
  file://management-if.html \
  file://management-if.service \
  file://httpd.conf \
  "

S = "${WORKDIR}"

inherit systemd

SYSTEMD_SERVICE:${PN} = "management-if.service"
SYSTEMD_AUTO_ENABLE = "enable"

do_install() {
    install -d ${D}/var/www
    install -d ${D}${sysconfdir}/management-if/
    install -d ${D}${systemd_system_unitdir}

    install -m 0644 ${WORKDIR}/management-if.service ${D}${systemd_system_unitdir}
    install -m 0644 ${WORKDIR}/management-if.html ${D}/var/www
    install -m 0644 ${WORKDIR}/httpd.conf ${D}${sysconfdir}/management-if
}
Step 6: enable http packets through simple firewall
Create the following directories and files:
To enable HTTP packets on eth0 network interface only,
80-http.sfw contains the following:
INPUT
    protocol=tcp dport=http if=eth0
This allows only HTTP packets to pass through the eth0 interface; all other
packets will be handled by the default simple-firewall configuration,
which will drop them.
This rule should be installed by simple-firewall%.bbappend under
/etc/simple-firewall.d/:
FILESEXTRAPATHS:prepend := "${THISDIR}/files:"

SRC_URI += "file://80-http.sfw"

do_install:append() {
    install -m 0644 ${WORKDIR}/80-http.sfw ${D}/${sysconfdir}/simple-firewall.d
}
Step 7: build the image
Add meta-management to the Yocto environement and build the image:
$ cat << EOF >> conf/bblayers.conf
BBLAYERS =+ "$ROOT/sources/meta-management"
EOF
$ bitbake welma-image-minimal-dev
Install the resulting image
tmp/deploy/images/$MACHINE/welma-image-minimal-dev-$MACHINE.wic.gz onto your
device and boot it. You can access the web server using the eht0 ip address
either:
-
From the host machine terminal:
-
From a web browser:
Step 8: test the web management interface through WLAN
To test the uniqueness of access via the Ethernet interface, you will
need to connect the wlan0 interface to the Wi-Fi network.
Warning
when two network interfaces are on the same L2 layer, by default, Linux uses a weak host model for ARP, which mean that it may answer ARP requests for any of its local IP addresses on any interface, not strictly the interface that owns the address.
In our case, if both wlan0 and eth0 interfaces are on the same
network, Linux (in the Raspberry Pi) will respond to the ARP
request to resolve the IP address of wlan0 with the MAC address
of eth0, and in this case, consulting the web server via the IP
address of wlan0 actually routes the packets to the MAC address
of eth0, authorized by the firewall.
In your host machine, you can check the MAC address of both ip addresses of your Raspberry pi using the following command:
$ arp -na
? (192.168.1.105) at dc:a6:32:c2:ce:70 [ether] on enp0s31f6
? (192.168.1.106) at dc:a6:32:c2:ce:70 [ether] on enp0s31f6
dc:a6:32:c2:ce:70 MAC address of
eth0, WiFi traffic for 192.168.1.106 address will be also
routed to eth0 interface.
Since we are using the same network, we need to stop the eth0 interface
and run the wlan0 interface only during this test using the following
command on the Raspberry pi
serial port:
raspberrypi4-64-welma:~# ip link set eth0 down
raspberrypi4-64-welma:~# systemctl restart wpa_supplicant@wlan0
wlan0
raspberrypi4-64-welma:~# ip a show wlan0
3: wlan0: <BROADCAST,MULTICAST,UP,LOWER_UP> mtu 1500 qdisc fq_codel state UP group default qlen 1000
    link/ether dc:a6:32:c2:ce:71 brd ff:ff:ff:ff:ff:ff
    inet 192.168.1.106/24 metric 1024 brd 192.168.1.255 scope global dynamic wlan0
       valid_lft 86390sec preferred_lft 86390sec
    inet6 fe80::dea6:32ff:fec2:ce71/64 scope link proto kernel_ll
       valid_lft forever preferred_lft forever
With this IP address, we can still ping the Raspberry Pi:
$ ping 192.168.1.106 -c 2
PING 192.168.1.106 (192.168.1.106) 56(84) bytes of data.
64 bytes from 192.168.1.106: icmp_seq=1 ttl=64 time=55.9 ms
64 bytes from 192.168.1.106: icmp_seq=2 ttl=64 time=7.25 ms

--- 192.168.1.106 ping statistics ---
2 packets transmitted, 2 received, 0% packet loss, time 1001ms
rtt min/avg/max/mdev = 7.254/31.565/55.877/24.311 ms
But the Web application is not reachable:
$ curl http://192.168.1.106/management-if.html
curl: (28) Failed to connect to 192.168.1.106 port 80 after 135972 ms: Connection timed out
Dropped wlan0 packets are logged on the Raspberry Pi buffer:
Summary
In this tutorial, you created a minimal web management interface page
and integrated it into your Yocto image. You then deployed a lightweight
web server configured to start automatically at boot and serve the
management-if.html page.
Finally, you validated that the interface was accessible while all other inbound traffic remained blocked, demonstrating how to securely expose a device service without weakening the firewall baseline.